This is from an article which I originally wrote on the hardcore-bicycle-science mailing list.
A while ago Mark Buglier said:
I have seen the Pashley chaincase for sale separately, at a LBS here in Seattle called Bikesmith. I doubt it is oil-tight for a proper oil bath, but it seems to be as fully-enclosed as the English roadsters of yore. Plastic, I believe, but it's been a while since I looked atit.
I recently bought one of the Pashley chaincases (from Bikesmith) and installed it on my commuting bike (which is a Trek 400 road bike with a Nexus 7sp hub). I thought I would offer my comments here. It is not oil tight (in fact there are little drain holes in the bottom), but it is fairly tight. There are still some areas where water can get in around the rear cog, but I doubt that much water would get in there in practice.
These, like most chaincases I've seen, require the frame dimensions to match nearly perfectly, and so won't fit on most bikes. Especially the chainstay length, but also some clearance issues like where the chainring comes close to the chainstay.
I did run into many issues with fit while installing, but everything is working okay now. Here is a list of issues that I ran into:
1) The chaincase was clearly not designed for the Nexus hub. I ran into issues with clearance for the shifting mechanism (where the cable comes into the hub), and the bracket which holds the rear part of the chaincase got in the way of the rear cog. I worked around the first problem by removing material from the chaincase around the hub, and worked around the second problem by building a bracket to hold the bracket which holds the chaincase.
2) My chainstays (which are 43cm or 44cm I believe) were too short for the chaincase. I worked around this by removing some material in the rear part of the chaincase to allow it to work with shorter chainstays. It sticks out way in the back of the rear cog, and looks funny, but that is okay.
3) It doesn't work well with my crankset (which is an SR Super Champion, and similar in construction to most 5 arm cranksets). I had to remove a lot of material near the crank to allow the crank to turn freely. The spider and one chainring are a bit too wide for the front of the chaincase, so there is a bit of friction where the crank rubs the case. I don't notice the friction while riding. I also had to grind off the pin on the crank which is designed to stop the chain from getting caught between the outer ring and arm.
My overall impression is that it was a pain to install (it took me about 3 hours, and a lot of time with the grinding wheel on a dremel tool), but that it works pretty well once installed. It isn't designed for your average roadbike with a Nexus hub, but it was possible to modify it in my case to work. Its not 100% sealed, but its provides much better weather protection then any other system that was available to me.
Once the chaincase has been installed once it only takes a few minutes to remove it and install it again. While writing this article I went downstairs and took pictures of it. In 10 minutes I was able to remove it, take the pictures, and put it back together again.
There are pictures at http://www.phred.org/~alex/bikes/chaincase . They are uneditted, straight from my digital camera, and thus a bit large. Here is an index of what is there:
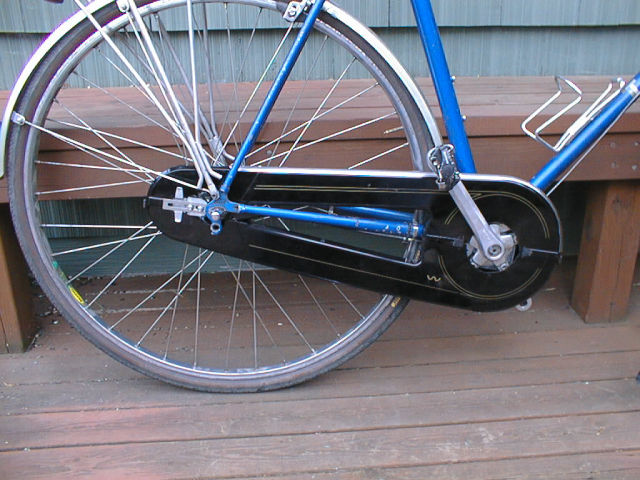
0418_001.jpg - The chaincase on my bike
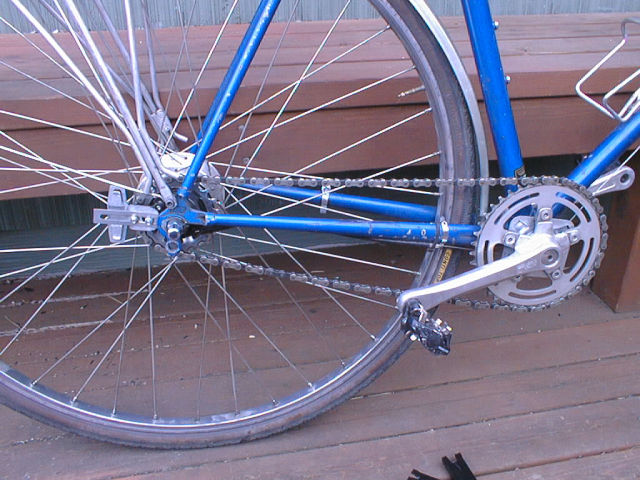
0418_006.jpg - The bike with the chaincase removed. You can see the two mounting brackets, one at the bottom bracket, and one behind the hub.
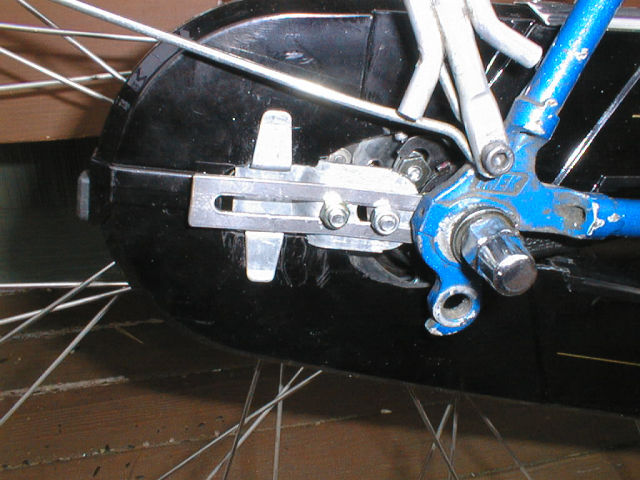
0418_002.jpg - A closeup of the bracket system that I hacked together near the rear hub. The metal holding the chaincase bracket is from a rack stay. I drilled out one end to 9mm, slipped it over the axle, then used two bolts to attach the Pashley bracket. Without this the Pashley bracket interfered with the rear cog and shifting mechanism.
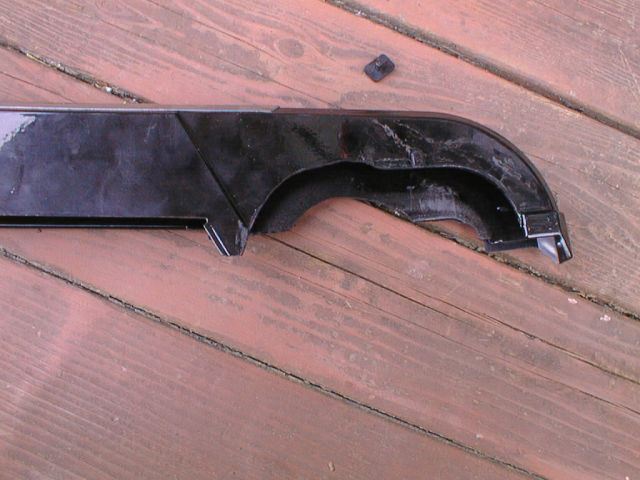
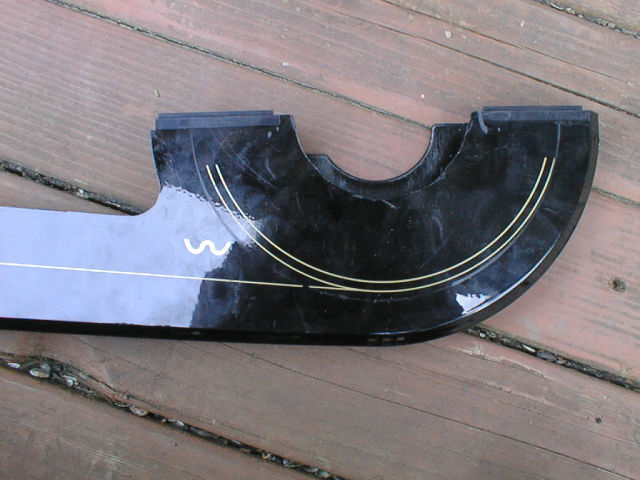
0418_004.jpg - The rear part of the upper half of the chaincase, off of the bike. You can see where I removed material on the inside to make it work with my shorter chainstays. You can also see where I removed material on the outside to clear some of the shifting mechanism. The lower half of the chaincase has identical parts that I cut out.
0418_005.jpg - The front part of the chaincase. You can see where I removed material on the outer part of the chaincase to clear the spider on my crankset. Installed with the proper crankset the chaincase would have had a ~1.5" hole in the center for the crankarm to exit.
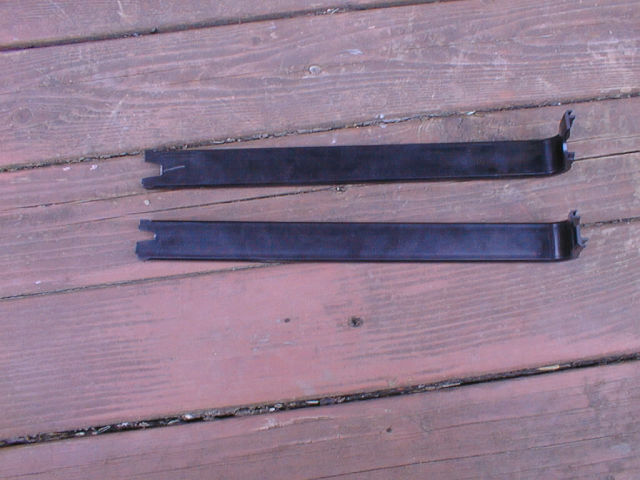
0418_007.jpg - These are pieces which fit into the chaincase around the chainstays to enclose the inner top and bottom of the chaincase. I had to cut out a section in each one to clear my rear cog. This would not have been an issue with a smaller rear cog, or with longer chainstays.
I am running a 42t chainring and 22t cog and that seems to be close to the maximum sizes which would work (at least in my case).
alex